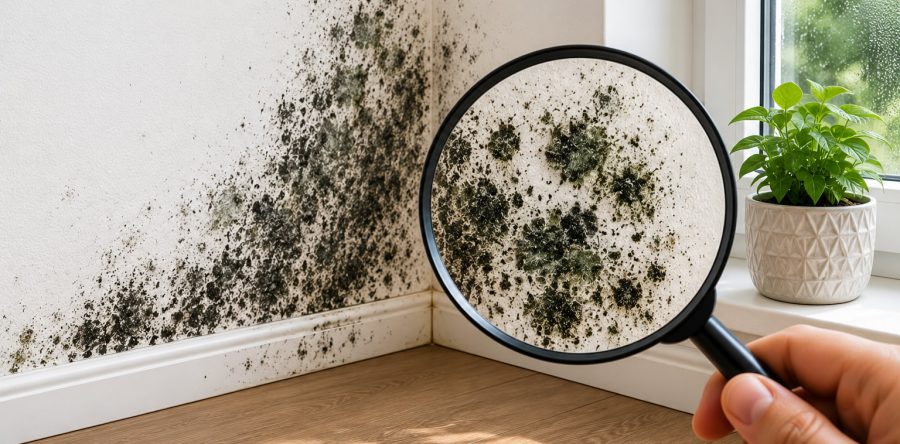
Mould is not always obvious. Sometimes it appears as dark spots on walls or ceilings, but other times it may be hidden behind furniture, inside cupboards, around windows, under flooring, behind plasterboard, or near areas affected by moisture. This guide explains how to detect mould in your home using practical checks such as visual inspection, smell, moisture clues, ventilation problems, and optional home testing.

This article is intended as a general guide only. It does not replace professional mould testing, building advice, or medical advice. If you are unsure, or if mould may be widespread, hidden, recurring, or linked to health concerns, consider speaking with a qualified mould tester or building professional.
Why Mould Can Be Difficult to Detect
Mould needs moisture, oxygen, a food source, and suitable temperatures to grow. Inside the home, it may grow on plaster, timber, carpet, dust, fabric, wallpaper, grout, silicone, cardboard, or other damp materials. Mould spores can also move through the air and settle on surfaces where conditions allow growth.
Not every stain, smell, or mark is mould, and not every mould problem can be confirmed by sight alone. The best approach is to look for patterns: moisture, musty odours, condensation, water damage, poor airflow, and visible growth.
Step 1: Look for Visible Signs of Mould
The first step in learning how to detect mould is to inspect areas where moisture is likely to collect. Mould may appear as black, green, grey, brown, yellow, or white patches. It may look powdery, fluffy, slimy, stained, or spotty.
Common places to check
- Bathroom ceilings, grout, silicone, shower screens, and exhaust fans.
- Window frames, blinds, curtains, and nearby walls.
- Kitchen cupboards, especially under sinks and near dishwashers.
- Laundries, washing machine areas, and dryer vents.
- Wardrobes, especially on external walls.
- Behind beds, sofas, cabinets, and large furniture.
- Ceiling corners, skirting boards, and wall edges.
- Air-conditioning vents and return air grilles.
- Carpet edges, rugs, underlay, and areas previously affected by leaks.
Step 2: Check for Musty or Damp Smells
A persistent musty, earthy, or damp smell can be one of the early warning signs of mould. This smell may be stronger in closed rooms, wardrobes, cupboards, storage areas, or rooms with poor airflow.
If the smell improves after airing the room but returns when doors and windows are closed, it may suggest a moisture or ventilation issue. A musty smell does not prove mould is present, but it is a reason to investigate further.
Step 3: Look for Moisture and Water Damage
Mould is often a symptom of excess moisture. If you want to detect mould properly, it is important to look for the moisture source as well as the visible growth.
Possible moisture clues include:
- Water stains on ceilings or walls.
- Peeling paint or bubbling plaster.
- Swollen skirting boards or warped timber.
- Damp carpet or soft flooring.
- Condensation on windows or walls.
- Leaking pipes, taps, gutters, roofs, showers, or appliances.
- Previous flooding or storm damage.
If mould keeps returning after cleaning, there may be an ongoing moisture problem that has not been fixed.
Step 4: Check Ventilation and Airflow
Poor ventilation can allow moisture to stay on surfaces for longer, making mould growth more likely. Bathrooms, laundries, kitchens, and bedrooms are common problem areas.
Check whether exhaust fans are working, windows can be opened, air vents are clear, and furniture is not pushed tightly against cold external walls. In some homes, simple changes such as improving airflow, using exhaust fans for longer, drying wet areas, and reducing condensation may help reduce mould risk.
Step 5: Look for Signs of Hidden Mould
Not all mould is visible. In some homes, mould may be hidden behind plasterboard, under flooring, inside roof spaces, behind kitchen cabinetry, beneath carpets, or within wall cavities.
Possible signs of hidden mould include:
- A musty smell with no obvious source.
- Recurring mould after cleaning.
- Staining that spreads or returns.
- Recent or past water leaks.
- Condensation that regularly forms in the same area.
- Paint, plaster, or wallpaper that bubbles, cracks, or peels.
- Rooms that feel damp, stale, or poorly ventilated.
These signs do not confirm hidden mould, but they may indicate that further investigation is worthwhile.
Step 6: How to Detect Mould Using a Home Test Kit
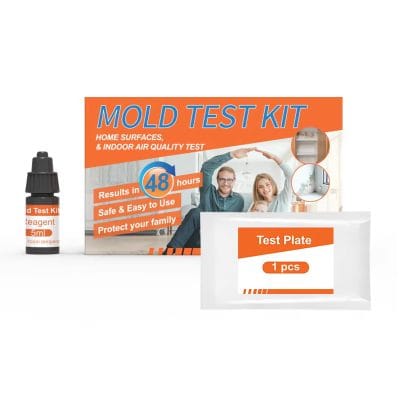
A home mould test kit can be one step in checking for mould, but it should not be treated as a complete diagnosis. It may help you observe whether mould growth appears after sampling air, an air-conditioning vent, or a surface.
If you would like to learn more about the testing process, see our DIY Mould Test Kit.
The kit instructions demonstrate how air, vent and surface samples can be collected and observed at home.
The DIY Mould Test Kit includes instructions that explain three general testing options: an air sample, an air-conditioner or air vent sample, and a surface sample. The kit includes a prepared plate, reagent, cotton swab, instructions, and retail box.
Preparing the test plate
According to the kit instructions, the plate is prepared by opening the kit, removing the lid, adding the reagent to the bottom of the plate, closing the lid carefully, and gently rotating it until the bottom is covered. The instructions then advise waiting at least one hour for the liquid to solidify into a gel.
Air sample
For an air sample, the prepared gel plate is exposed to the air for one hour in the selected test location. The lid is then closed carefully, and the plate is left to incubate at room temperature for 48 hours. After this, the plate can be observed daily for signs of mould growth, noting that some moulds may grow more slowly.
Air-conditioner or vent sample
For an air-conditioner or air vent sample, the prepared plate is exposed near the air vent. The air conditioner is turned on for around 10 minutes so airflow can impact the gel surface. The plate is then closed carefully and incubated at room temperature for 48 hours before being observed daily.
Surface sample
For a surface sample, the included swab is gently rubbed over the suspected mouldy area. The swab is then gently rubbed over the gel surface. The lid is closed carefully, and the plate is incubated at room temperature for 48 hours before daily observation.
Important safety notes when testing
The kit instructions recommend washing hands thoroughly before handling the gel plate, avoiding contact with the gel surface, and wearing protective gear such as gloves, a mask, and goggles during testing. When sampling a suspected mouldy area, rub gently to reduce the chance of damaging the surface or disturbing spores.
Home testing may provide useful information, but it should be viewed as one part of a broader mould detection process. It may not identify the full extent of a moisture problem, hidden mould, or the cause of mould growth.
Step 7: When to Seek Professional Mould Testing
There are times when it is better to seek help from a qualified mould testing professional. This is especially important if mould is widespread, keeps returning, appears after flooding or water damage, or may be hidden inside walls, ceilings, roof cavities, or subfloors.
A professional mould tester may use equipment such as moisture meters, thermal imaging cameras, air sampling tools, surface sampling, and laboratory analysis. They may also help identify moisture sources that need to be fixed before mould can be properly controlled.
If you are unsure whether mould is present, cannot find the source of a musty smell, or have concerns about possible health effects, consider speaking with a professional mould tester, building consultant, plumber, roofer, or healthcare provider.
Step 8: Reduce the Conditions That Allow Mould to Grow
Detecting mould is only part of the process. To reduce the chance of mould returning, the underlying moisture problem needs to be addressed where possible.
Helpful prevention steps may include:
- Fixing leaks as soon as possible.
- Drying wet areas quickly.
- Using bathroom and kitchen exhaust fans.
- Reducing condensation on windows and walls.
- Improving airflow around furniture and cupboards.
- Avoiding storage of cardboard or fabric items in damp areas.
- Keeping gutters, downpipes, and drainage working properly.
- Monitoring rooms that feel damp or smell musty.
Small areas of surface mould may sometimes be cleaned safely, depending on the material and extent of growth. However, porous materials, recurring mould, water-damaged areas, or larger mould problems may require professional assessment.
Final Thoughts
Learning how to detect mould in your home involves more than looking for black spots. Visible growth, musty smells, condensation, water damage, poor airflow, and recurring dampness can all provide clues that mould may be present.
A home mould test kit can be a helpful first step, especially when checking air, vents, or a suspected surface. However, it is only one tool and should not be relied on as the only way to assess a mould problem.
If mould is widespread, hidden, recurring, or you are unsure what you are dealing with, the safest option is to seek advice from a qualified mould testing professional.

How to Detect Mould in Your Home