
(Step-by-Step Guide for Accurate Readings)
Moisture meters are essential tools in woodworking, construction, and home inspection. Knowing how to use a moisture meter correctly helps you confirm whether wood, concrete, plaster, drywall, brick, or even soil has the right moisture content before you build, seal, install, or repair.
In this guide, you’ll learn how to use a moisture meter in a professional setting for accurate, repeatable readings, plus a quick section on plant and DIY use.
What Is a Moisture Meter?
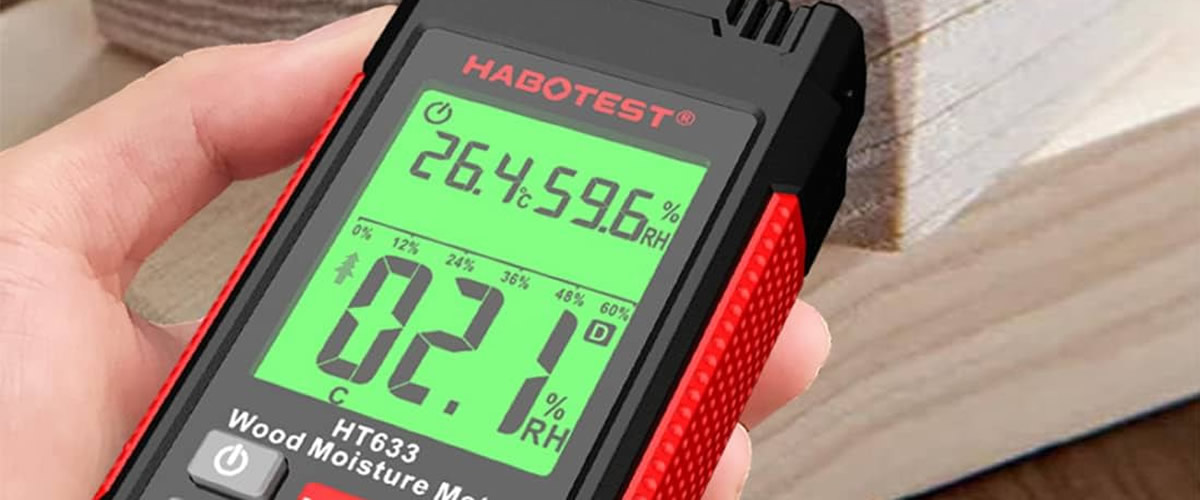
A moisture meter is a device used to measure moisture content in materials. Many pin-type meters use two metal probes (pins) inserted into the material to estimate moisture based on electrical resistance. In general, higher moisture = higher conductivity.
Professionals use moisture meters on wood, drywall, and concrete to reduce the risk of warping, mould growth, adhesive failure, coating problems, and structural damage. For example, flooring and coatings often require a safe moisture level before installation.
Why Use a Moisture Meter?
In professional settings, moisture problems can be hidden until they become expensive. Using a moisture meter helps you identify issues early and confirm materials are ready for the next stage of work.
- Prevent Material Damage: Avoid wood that splits, cracks, or warps from excess moisture.
- Support Structural Integrity: Reduce the risk of mould growth, coating failure, or cracking caused by improper moisture.
- Save Time and Money: Catch moisture issues early before they cause costly rework or replacements.
How to Use a Moisture Meter for Wood, Concrete, and Building Materials
If you’re searching for how to use a moisture meter professionally, the key is consistent technique: correct settings, stable contact, and multiple readings across the area.
Step 1: Prepare the Device
- Power on and check batteries: Weak batteries can cause slow stabilisation or inconsistent readings.
- Select the correct material setting: If your meter supports material groups (wood, drywall, concrete), choose the correct option for better accuracy.
- Inspect the pins/probes: Bent or dirty probes can skew results. Ensure they are clean and straight.
Step 2: Measure Wood Moisture (Woodworking & Flooring)
Wood moisture content affects stability. Measuring correctly reduces the risk of shrinkage, swelling, cupping, and warping after installation.
- Insert the probes firmly: Push the pins into the wood with steady pressure. For improved consistency, aim for a similar depth each time.
- Take multiple readings: Test several points across the board, including ends and the centre. Moisture can vary by grain direction and storage conditions.
- Compare pieces from the same batch: This helps identify an outlier board that could cause issues later.
Typical Moisture Levels for Wood
- Indoor furniture / interior timber: 6–8% moisture content
- Outdoor projects / exterior timber: 9–14% moisture content
Tip: If wood reads above 20% moisture content, it’s commonly considered too wet for many indoor applications and may need more drying time to avoid future movement.
Step 3: Test Concrete, Brick, Drywall, and Other Building Materials
When testing building materials, your goal is to confirm whether the surface and surrounding area are within an acceptable moisture range for the next step (painting, sealing, installing coverings, or identifying leaks).
- Position the meter correctly: Place probes on the surface (or insert pins where appropriate). Keep contact stable while the reading settles.
- Check multiple zones: Test corners, around plumbing penetrations, near windows, and any visibly stained areas.
- Use readings to map the problem: Higher readings clustered in one area can indicate a leak, poor ventilation, or moisture wicking.
- Confirm drying progress: For new concrete or repairs, periodic readings help track curing/drying before sealing or installing finishes.
Common Problems and Solutions When Using Moisture Meters
-
Inconsistent Readings:
Ensure the probes are making consistent contact and you’re using the correct setting for the material. Retest nearby areas and average the results. -
High Salt or Mineral Content:
Some materials (or contamination) can influence conductivity-based readings. If results look unusual, compare multiple spots and inspect the area for surface contamination. -
Damaging the Surface:
Avoid forcing the pins into delicate or finished surfaces. Use steady pressure and choose a suitable test location, especially on visible timber.
Moisture Meter for Plant Care and DIY Projects
A soil moisture meter helps prevent overwatering and underwatering. To use it, insert the probes into the soil near the root zone, wait about 30–60 seconds, and read the result. Low readings suggest the plant may need water; higher readings indicate the soil is still moist.
How to Clean and Store a Moisture Meter
- Wipe the probes after use: Use a dry, soft cloth to remove residue and moisture.
- Store it dry: Keep the meter in a cool, dry place and avoid leaving it in damp areas like wet toolboxes or on-site floors.
External Authority and Reviews
Moisture meters are widely recommended by professionals. For example, Fine Woodworking discusses the value of moisture testing to confirm timber is properly dried before use, and Concrete Network recommends moisture checks to help confirm concrete is ready for sealing or finishing. Referencing recognised industry sources supports best-practice use and highlights why accuracy matters.
FAQs: How to Use a Moisture Meter
How to use a moisture meter on wood?
Select the wood setting (if available), insert the pins firmly, then take multiple readings across the board and average them. This helps reduce errors caused by uneven moisture distribution.
How to use a moisture meter on concrete?
Use the appropriate building-material setting (if available), keep contact stable, and test multiple locations. Track readings over time to confirm drying progress before sealing, coating, or installing coverings.
Why do moisture meter readings vary across the same material?
Moisture can vary due to airflow, storage conditions, thickness, surface contamination, or water ingress. Multiple readings help you identify patterns rather than relying on a single spot.
How many readings should I take?
For professional work, take several readings across the area (at least 5–10 points for larger pieces or rooms) and compare the results to identify wet zones or outliers.
Can I use the same moisture meter for wood and plants?
Some meters are suitable for multiple uses, but accuracy depends on the device design and settings. Use the correct mode/material group if your meter provides one, and follow the manufacturer’s instructions for each application.
Concluding Insights: How Moisture Meters Safeguard Your Projects
Understanding how to use a moisture meter helps you avoid hidden moisture problems and confirm materials are ready for the next stage of work. Whether you’re checking timber before building, investigating a damp patch during an inspection, or monitoring drying progress after repairs, a moisture meter supports accurate decisions and better outcomes.
Buy 4 in 1 Digital Moisture Meter